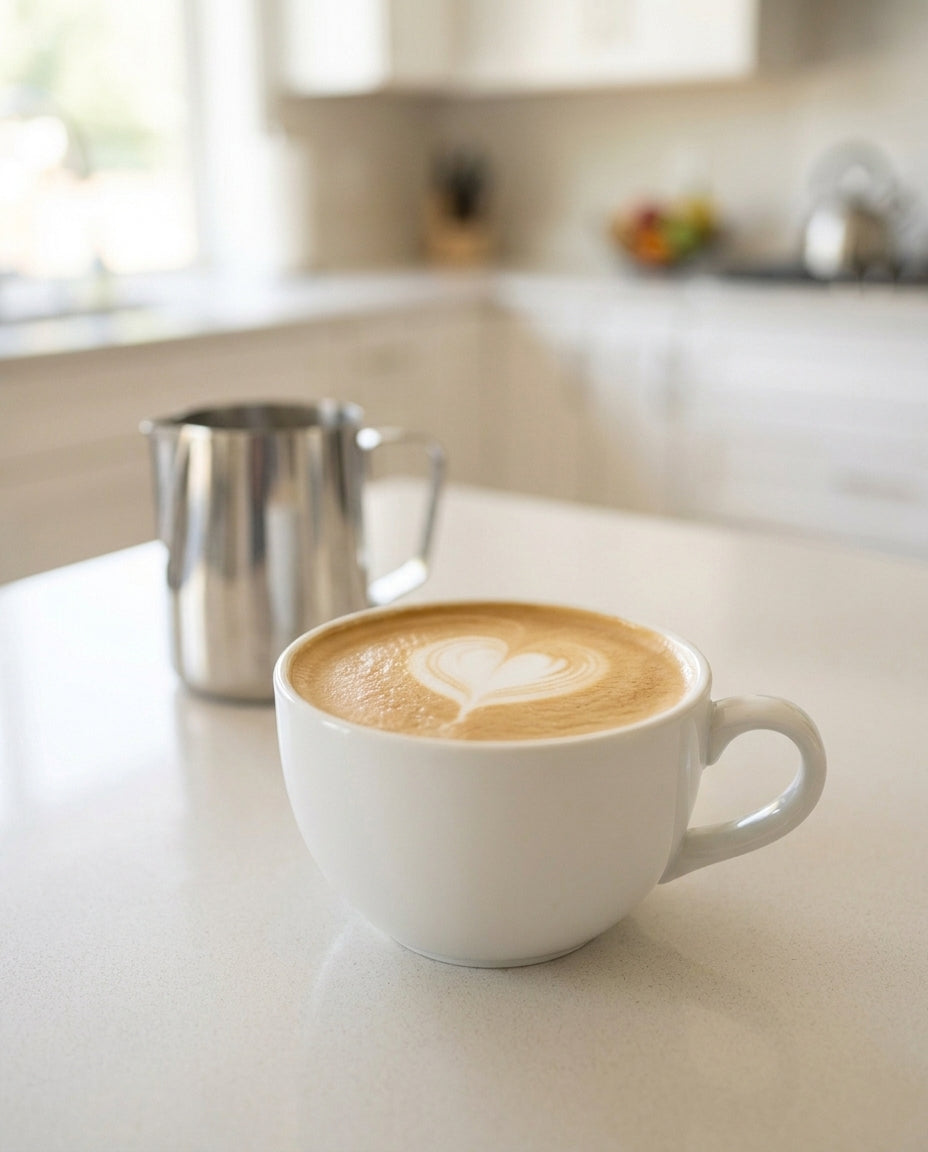
The latte is the drink most people picture when they picture espresso at home: one shot, plenty of steamed milk, and a thin cap of foam no deeper than a quarter inch. That ratio, roughly one part espresso to four parts milk, is the whole recipe. Everything else is technique.
Here's the thing about milk: temperature does more for flavor than any syrup. Milk tastes sweeter as it warms because warmth makes the lactose already in it read sweeter on the tongue, and that sweetness peaks right around 140 F. Push past 160 F and it cooks instead, which is why a scorched latte tastes flat no matter how good the shot was.
The milk, in detail

Whole milk is the default for a reason. Its fat carries flavor and its protein builds stable microfoam, which is why cafes reach for it without asking. 2% works with slightly thinner foam. Skim stretches into big airy bubbles that collapse fast.
For non-dairy, oat milk is the closest match, and the barista blends earn their label: they add protein and fat specifically so the milk stretches instead of splitting. Almond and soy both steam, but keep them under 140 F or they separate in the cup.
Whatever you steam, the finish line looks the same: milk with the sheen of wet paint and no visible bubbles. If you can see bubbles, tap the pitcher firmly on the counter and swirl until they disappear. A proper spouted pitcher makes the pour half the battle - ours lives in the milk frothing collection along with the clip-on thermometer from the steps.
Steaming, phase by phase
Steaming is two jobs in one pass, and knowing where one ends is what separates silky milk from bubble bath.
The first job is stretching. With the wand tip just below the surface, air gets pulled in and the volume grows, with a soft paper-tearing sound each time it does. For a latte you want only 2 to 3 seconds of this, enough to grow the milk by about 25 percent. Every extra second of hissing becomes foam you will have to pour around later.
The second job is texturing. Sink the tip deeper, angle the pitcher so the milk spins into a whirlpool, and let it roll. The vortex shears the big bubbles you just made into microfoam, thousands of bubbles too small to see, which is what gives steamed milk its glossy, paint-like body.
The stopping point is the most important number in this recipe. Between 140 and 150 F milk tastes its sweetest and the foam is at its most stable. By 160 F the whey proteins holding the foam together start to break down, the sweetness fades, and a cooked note creeps in that no syrup can cover. Starting with fridge-cold milk at around 40 F buys you the longest runway to finish both phases before the temperature runs away from you.
Where the latte sits
The latte, cappuccino, and flat white are the same two ingredients in different proportions. A cappuccino splits the cup into even thirds of espresso, steamed milk, and a deep foam dome, so it drinks stronger and lighter at once. A flat white runs two shots under a shorter pour of milk with barely any foam, which makes it the most coffee-forward of the three. The latte is the biggest and mildest, which is exactly why it's the one most people order. Prefer the espresso with no milk at all? Lengthening the shot with hot water makes an americano.
If you can make a latte, you can make the other two by moving the same dials: shot count, milk volume, and how long you let the wand add air. Our How to Make a Cappuccino and How to Make a Flat White recipes pick it up from there. Still choosing hardware? Every espresso machine set we make ships with the grinder, pitcher and tamper this recipe uses.
The ratios, side by side
The whole milk-drink family on one card. Aeration time is the seconds of surface hissing at the start of the steam, the single dial that sets foam depth.
| Drink | Espresso | Steamed milk | Foam | Aeration time |
|---|---|---|---|---|
| Latte | 1 to 2 shots | 8 to 10 oz | Quarter inch | 2 to 3 seconds |
| Cappuccino | 1 to 2 shots | 2 to 3 oz | 1 inch or more | 5 to 8 seconds |
| Flat white | 2 shots | 4 to 5 oz | Thin sheen | 1 to 2 seconds |
| Macchiato | 1 to 2 shots | None | A spoonful on top | 3 to 4 seconds |
| Iced latte | 1 to 2 shots | 8 oz cold, no steam | None | None |
The macchiato is the outlier: espresso marked with a dollop of foam and nothing else. The rest of the table is one steaming technique with the aeration dial turned up or down.
Pick your cup size
Cup size quietly decides how your latte tastes, because milk scales with the cup and espresso only scales when you decide it does.
- 8 oz cup: one shot and about 6 oz of milk. The strongest, most balanced version, and the closest to what a traditional cafe in Italy or a specialty shop serves.
- 10 oz mug: one shot and the 8 oz of milk in this recipe. Still clearly a coffee drink, just more of it.
- 12 oz cup: two shots and about 9 oz of milk. Doubling the espresso keeps the ratio near one to four, so it tastes like the 8 oz drink, just bigger.
- 16 oz cup: two shots reads milky and mild, exactly how most large to-go lattes taste. Pull a third shot to keep the coffee in front.
The rule underneath: keep espresso between one fifth and one quarter of total volume and the drink stays a latte at any size. A clear glass cup is worth having while you learn, because seeing the layers shows instantly whether the ratio drifted.
Dial it in

If your foam comes out bubbly instead of silky, you added air too long. Two to three seconds of surface hissing at the start is plenty, then keep the wand buried and let the whirlpool do the work.
If the espresso tastes sharp under the milk, grind a touch finer and tamp evenly. A shot that runs in under 20 seconds is underextracted, and milk will not hide it. Aim for 25 to 30 seconds from first drip to a 1 oz shot, and if your grinder is the weak link, a proper burr grinder gives you the fine, even grounds espresso needs.
If the shots vary day to day, weigh them. Dosing 7 to 9 g of grounds for a single shot on a small coffee scale removes the biggest variable before the machine even switches on.
If the drink goes lukewarm by the time you sit down, warm the mug first. Run a little hot water into it while the machine heats, dump it before you pull the shot, and the latte holds its temperature minutes longer.
Latte art for beginners
The milk you just steamed is the exact texture latte art needs, so you may as well try.
Start every pour the same way: from 3 to 4 inches above the cup, in a thin, steady stream aimed at the center. Height matters because the falling milk needs enough speed to dive under the crema instead of sitting on top of it, so the surface stays brown while the cup fills.
When the cup is about two thirds full, everything changes at once. Tilt the cup 20 to 30 degrees toward the pitcher, drop the spout to within a half inch of the surface, and speed the pour up slightly. Close to the surface the milk stops diving and the white foam blooms on top. Hold the pitcher still and a circle grows, and that circle is the foundation of every design.
For a heart, the simplest pattern, let the circle grow until the cup is nearly full, then lift the pitcher and cut a thin, fast stream straight through the middle. The stream drags the circle into a point.
Set your expectations honestly: your first pours will be plain white blobs, and a blob tastes identical to a rosetta. Most people need a few dozen pours before the heart shows up reliably, and milk texture is why art fails far more often than wrist technique. Glossy, bubble-free milk does most of the work for you.
Making two at once
Steam once, pour twice. Pull both shots first, into their own mugs, then steam the full pitcher of milk and pour one drink straight after the other. Milk starts separating into liquid and foam within a minute of steaming, so the second pour gets a quick swirl first. Pouring two lattes from one pitcher is also the fastest way to practice consistency, because both cups tell you exactly what changed between pours.
Make it yours
Add the syrup to the espresso before the milk. The shot is at its hottest straight out of the machine, and the turbulence of the milk pour blends the syrup through the whole drink without a spoon. Stirring afterward wrecks the layers and leaves the last sip syrupy.
The classic amounts, for an 8 oz milk pour:
- Vanilla or caramel: 0.5 oz of syrup, about 1 tablespoon, into the shot first.
- Mocha: 1 tablespoon of chocolate syrup or cocoa whisked into the hot espresso until smooth, then pour the milk as normal.
- Honey and cinnamon: 2 teaspoons of honey stirred into the shot, with a pinch of cinnamon dusted over the finished foam.
- Seasonal: pumpkin spice in fall is 0.5 oz of pumpkin syrup or a quarter teaspoon of pie spice whisked into the shot, and peppermint in winter works at the same 0.5 oz.
Sugar-free syrups behave the same in the cup, and a dusting of nutmeg or cocoa on the foam adds aroma for zero calories.
Prefer it cold? The same recipe over ice becomes our iced latte, and if you want a make-ahead cold base for the week, batch a jar of cold brew instead.