Your espresso machine controls the water temperature, the pump pressure, and the brew time. The tamp is yours. That single step - pressing the grounds into a firm, level puck before the shot runs - is the one variable entirely in your hands, and it has a direct impact on what ends up in your cup.
An uneven tamp creates channels through the coffee puck. Water finds the path of least resistance, rushes through the gaps, and you end up with over-extracted grounds on one side and under-extracted grounds on the other. The result: bitter and sour in the same shot.
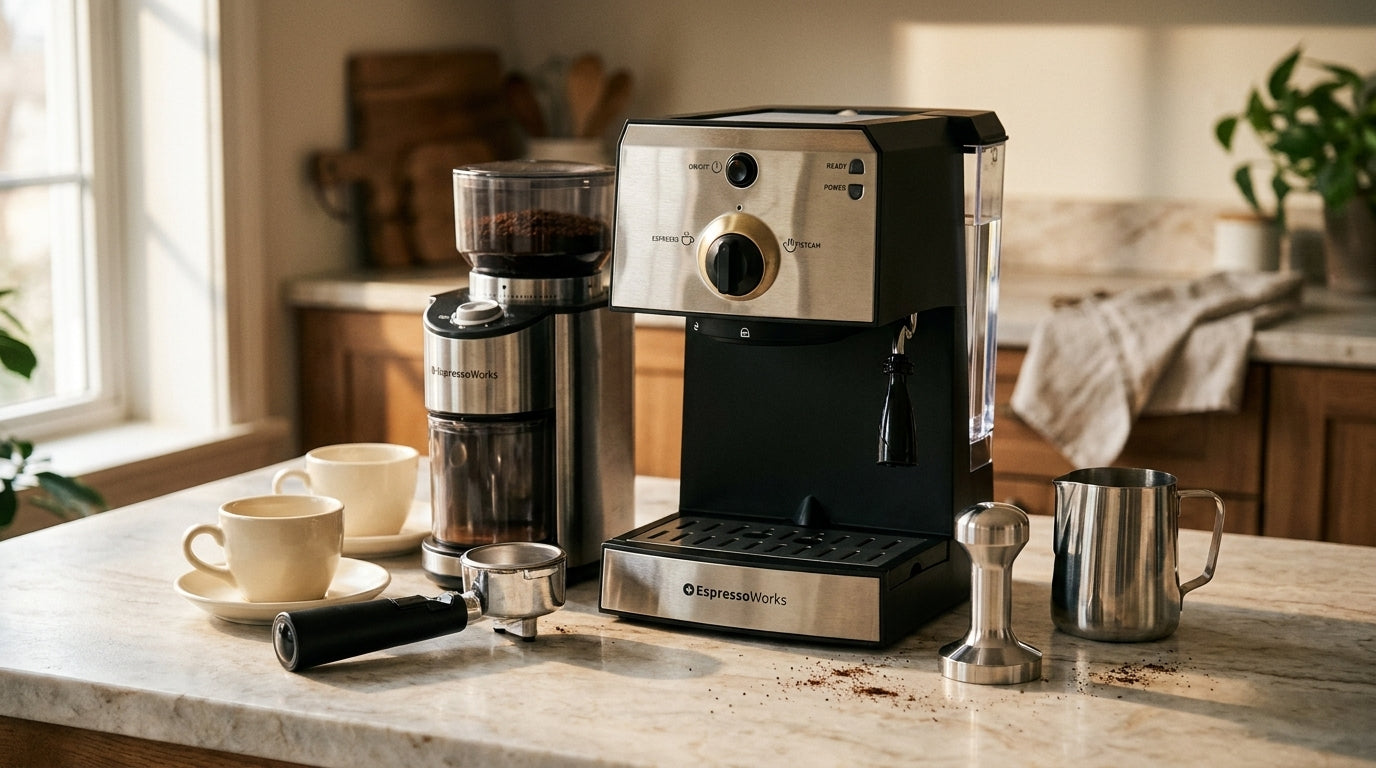
This guide covers the correct pressure, how to keep your tamp level, the distribution step most people skip, and the common mistakes that are easy to fix once you know what to look for. If you have an EspressoWorks machine, you already have a tamper in the box. Here's how to use it properly.
Why Your Tamp Directly Affects How the Shot Tastes
The coffee puck has one job: create consistent resistance across the full basket so the water extracts evenly. Every particle of ground coffee needs to contribute to that resistance. When the puck is level and consistently dense, water takes roughly 25-30 seconds to push through and picks up the full range of compounds on the way - sweetness first, then the fruit and acid notes, then the deeper body.
When there's a weak point in the puck, water piles through it. The grounds in that channel get over-worked: bitter, astringent, harsh. The grounds the water barely touches stay under-extracted: sour, thin, flat. Both end up in the cup at the same time - and the shot tastes muddled rather than balanced.
Here's the tell: if your shot runs noticeably faster on one side of the spout, that's channeling happening in real time. The extraction is uneven before you've taken a sip.
A level tamp - consistent pressure applied straight down across the whole basket - gives the water no shortcuts. The grounds compress into a uniform bed, extraction runs edge to edge, and you get a full-bodied, clean shot with proper crema. That's what the machine is built to pull, and a good tamp is what lets it.
Distribute the Grounds Before You Tamp

Here's the step most people skip: before the tamper touches your grounds, the bed needs to be even.
The simplest method is the Stockfleth move. Rest your index finger lightly against the inner rim of the basket and rotate the portafilter in a slow circle underneath it. The grounds sweep outward and settle more evenly across the bed. Three seconds. No tools required.
For a more thorough result, use the Weiss Distribution Technique (WDT). Take a toothpick - or a purpose-built WDT tool - and stir the grounds in a gentle circular motion from the outside in. This breaks up clumps that formed during grinding, the kind that survive a knock on the counter and get locked in permanently by the tamp. WDT is the most reliable way to guarantee an even bed before any pressure is applied.
After either method, give the portafilter one firm tap on the counter to settle the grounds. Then look across the basket. The surface should sit roughly flat from edge to edge. If it's mounded in the centre or lower on one side, redistribute before you pick up the tamper.
How to Tamp Espresso Step by Step
Before you press, check your tamper. It needs to match your basket diameter - any gap between the tamper base and the basket wall gives water a shortcut during extraction. The tamper included in your EspressoWorks set is sized to fit the basket. Then work through these four steps in sequence.
Get Your Grip and Stance Right
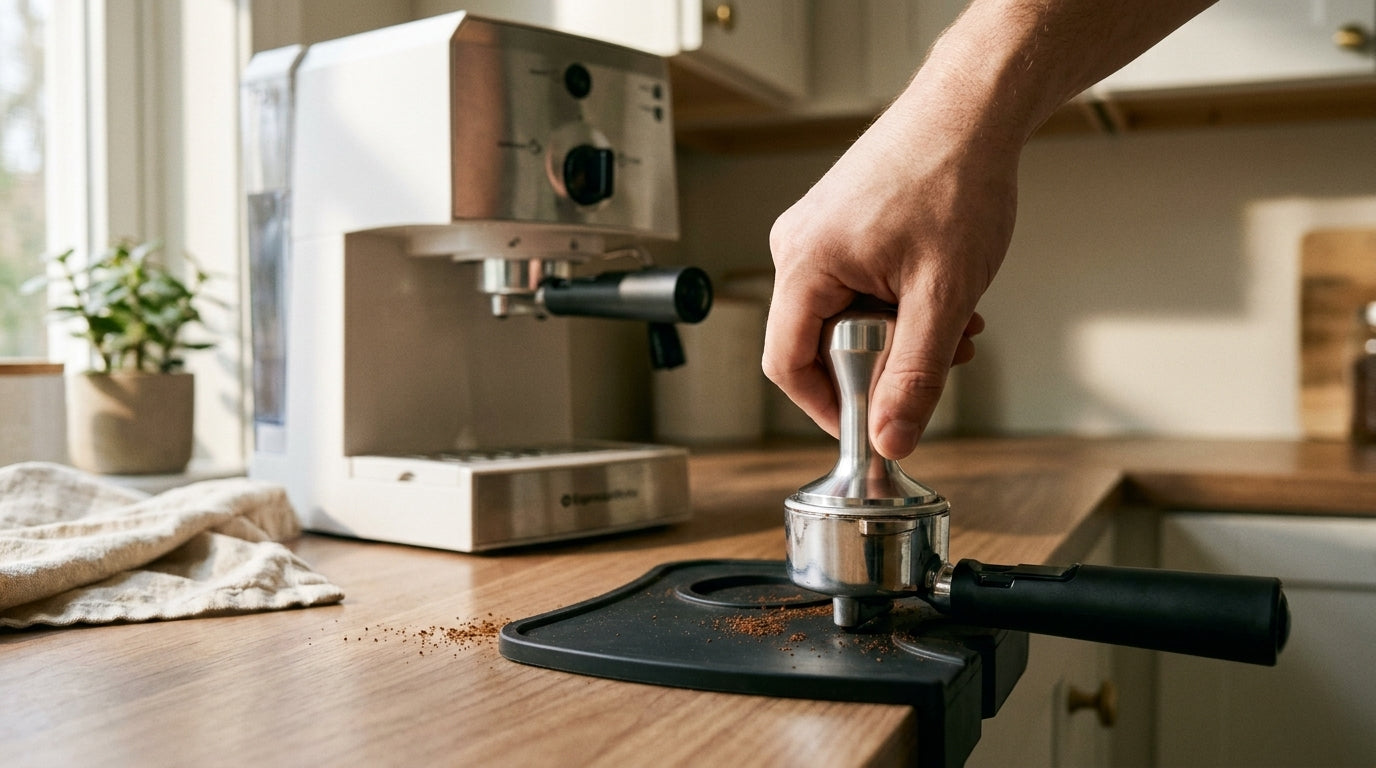
Hold the tamper handle in your palm, with the base of your thumb providing the downward force - not your fingertips. A fingertip grip reduces control and introduces angle before you've even started pressing.
Keep your wrist straight and your elbow at roughly 90 degrees. This positions your arm to drive straight down rather than at a diagonal. Stand directly over the portafilter, not to the side of it. Your body position sets your tamp angle.
Place the Portafilter on a Flat, Stable Surface
Set the portafilter on a countertop or tamping mat before applying any pressure. Tamping in the air gives you no reference point for level, and the portafilter shifts as you press. A flat, fixed surface does the levelling work for you. The portafilter should sit steady without rocking before the tamper touches the grounds.
Apply 30 Pounds of Pressure Straight Down
Press down in a single smooth motion until you feel the grounds firm up. That resistance is the puck reaching its natural density - the point where it won't compact further. Thirty pounds of force (roughly 14 kg) is the standard: firm and deliberate, not a light touch but not a full-body lean either.
The tamper base should sit flush and parallel to the basket rim. If one side lifts or dips, the puck will be uneven - and you'll see it in the crema.
Finish with a Light Polish Twist (Optional)
As you lift the tamper, a slight clockwise twist smooths the puck surface and helps seat the edge. Keep the downward pressure on while you twist - releasing pressure before you rotate can drag the surface and leave it uneven.
This step is optional. A level, firm press matters far more than the polish. Get the press consistent first, and add the twist when it feels natural.
How to Use a Bathroom Scale to Calibrate Your Tamping Pressure
Thirty pounds sounds precise until you try to apply it with your arm and no reference point. You can do this before your next shot.
Put your bathroom scale on the counter. Set your tamper on the platform. Then press down - using the same palm grip and straight-down stance from the previous section - until the scale reads 30 lbs, or 14 kg on a metric display. Hold it for a full second. That's the pressure. Lock it in.
Do it 5-10 times in a row. You're not testing the scale - you're training your arm. After a few reps, the pressure starts to feel familiar without needing to check a number.
What 30 lbs actually feels like: firm and deliberate. Roughly the effort of pressing your palm flat against a table with clear intent, or the force of a confident handshake. Not a casual lean. Not a full-body push. Controlled downward pressure.
Once you have that reference point, consistency matters more than precision. The same pressure every shot - even if it lands at 27 or 33 lbs - produces more reliable extraction than swinging between 20 and 40. The scale gives you the feeling. Repetition turns it into instinct.
Espresso Tamping Mistakes That Ruin Your Shot
Good tamping technique produces consistent shots. These five mistakes break it - and each one has a specific symptom in the cup that tells you exactly what went wrong.
Tamping at an angle. The most common mistake, and the hardest to self-diagnose. If the tamper sits even slightly off-horizontal when you press, one side of the puck ends up denser than the other. Water channels through the lighter side. The tell: patchy or tiger-striped crema, and a shot that finishes running faster on one side of the basket than the other.
Inconsistent pressure shot to shot. Technique can be correct and still produce variable results if the force changes every time. A 20 lb press followed by a 40 lb press gives you two different puck densities and two different extraction speeds. The bathroom scale calibration in the previous section exists precisely for this - train the pressure into muscle memory so it stops varying.
Skipping distribution. A level tamp over clumped grounds still produces an uneven puck. If your shots channel consistently despite a level press, the grounds before the tamp are the likely cause. Distribute first, every time.
Over-tamping. Pressing well beyond the 30 lb standard slows the flow to near-zero. The water extracts everything it can and keeps extracting - the result is bitter, dry, and astringent. The sign: a shot that crawls past 40 seconds or barely drips. On release, an over-tamped puck often cracks, which creates the channeling you were trying to prevent.
Tamper too small for the basket. A tamper that doesn't cover the full basket floor leaves a ring around the edge of the puck. Water finds that gap immediately and bypasses the coffee bed entirely. The shot runs fast, tastes sour and thin, and crema is sparse. The tamper base needs to cover the full basket floor - no gap, no shortcut.
Frequently Asked Questions
How hard should I tamp espresso?
30 lbs (roughly 14 kg) is the standard starting point. Consistency matters more than hitting that exact number every shot - the same firm, deliberate press each time produces more reliable extraction than varying between light and heavy. The bathroom scale method earlier in this guide is the fastest way to build that reference into muscle memory.
Does tamper size matter?
Yes, and it's not negotiable. The tamper base must cover your full basket diameter. A tamper even a few millimetres too small leaves a gap around the edge where water skips the coffee bed and the shot runs thin and sour. The tamper included in every EspressoWorks set is sized for the basket it ships with.
Should I tamp the same way for single and double baskets?
The technique is identical: same grip, same stance, same pressure. Single baskets are shallower than doubles, which leaves less margin for error. A slight angle that has minimal impact on a double shot can cause noticeable channeling in a single. Distribute carefully and keep the tamp level.
Flat tamper or convex tamper?
A flat base is the standard for home espresso and the easier of the two to learn with. It presses the grounds evenly across the full basket floor, giving you consistent density from edge to edge. A convex base leaves a slight dome in the centre, which can create lower density at the edges. Start with flat - it's the basis for everything in this guide, and it's what ships with EspressoWorks sets.
How do I know if my tamp is causing channeling vs. another problem?
Check the crema. Patchy, thin, or tiger-striped crema - dark and light bands across the surface - points to an uneven tamp or distribution issue. If the crema looks even but the shot tastes bitter or sharp, grind size or dose weight is the more likely cause. An angled tamp almost always shows up in the crema first.
---
Four things make every tamp consistent: distribute the grounds before you press, keep the tamper level, apply the same firm 30 lb pressure each time, and use a tamper that matches your basket diameter. That's the complete framework.
Before your next shot, put the bathroom scale on the counter and run the calibration. Press down 5-10 times until the pressure feels automatic. You'll carry that reference into every shot after it.
If you have an EspressoWorks machine set, the tamper is already in the box - flat base, sized for your basket. When you're ready to step up, the Double Sided Coffee Tamper combines a distributor and tamper in one tool - levelling and pressing in a single step. Browse the full tamper collection when you want to upgrade.
You have the technique. Now pull the shot.